


Bath waste and overflow: what to buy and how to fit it
A bath waste and overflow is the drain fitting and safety outlet that let water leave the tub and stop it flooding the floor if you forget the taps are running. Most domestic baths in the UK need a slotted combined kit sized for a 40mm (1½") connection, and the single most important step is measuring the drain-to-overflow distance before you order anything, since Approved Document H sets the drainage standards your fitting has to meet.
TL;DR:
- Ensure accurate measurements of drain-to-overflow and depth from the bath’s top edge to the overflow center to prevent fitting mismatches and leaks.
- Most UK domestic baths are drilled for slotted waste systems, with acrylic and steel baths predominantly designed for this standard.
- Use a combined waste and overflow kit for typical replacements, but verify that all parts are compatible and match your existing plumbing and finish before purchasing.
- Installing or replacing the waste and overflow should be done with thorough leak testing, including dry-run and flow checks, to avoid common DIY mistakes like overtightened joints.
- Regular maintenance, such as cleaning the overflow slot, checking the trap, and lubricating cable-operated pop-ups, extends system longevity and prevents common failure causes.
Table of Contents
- Which type of bath waste and overflow do you need?
- How do you choose and specify the right kit?
- How do you fit or replace a bath waste and overflow?
- Why is my bath waste leaking or draining slowly?
- Combined waste and overflow kits and when to use them
- What rules govern bath waste and overflow installation?
- How do you keep a bath waste and overflow working longer?
- Why trust this guide to bath waste and overflow fitting?
- Get your bathroom fittings sorted with Simcodirect
- Sources
Which type of bath waste and overflow do you need?
Every bath waste and overflow system does the same basic job differently, and picking the wrong mechanism is the most common reason DIYers end up returning parts. Slotted wastes have a small horizontal slot that lets overflow water drain away internally through the same pipe run; unslotted wastes rely on a separate overflow pipe. Nearly all standard acrylic and steel baths sold in the UK are drilled for slotted fittings, so check your existing waste before assuming otherwise, as APM Plumbing & Electrical’s fitting guide confirms slotted is the standard for domestic tubs.
The mechanism that opens and closes the plug varies too:
- Click-clack wastes use a simple push-to-open, push-to-close mechanism with no moving parts above the bath, which makes them the easiest to fit and the least likely to seize.
- Pop-up wastes connect to an overflow-mounted lever or a flexible cable running down to the plug, giving a cleaner look but more to go wrong mechanically.
- Plug-and-chain wastes are the traditional option: cheap, visible, and easy to replace, but less popular in modern bathroom designs.
You’ll also choose between a full kit (waste, overflow, trap, and all connecting pipework) and a trim-only kit that reuses your existing rough plumbing. Oatey’s guide to bath waste and overflow assemblies recommends flexible tubular kits for tight or awkward access, and rigid solvent-weld kits where the bath will be permanently boxed in. Chrome and brass finishes generally outlast chrome-plated plastic, which can pit and discolour within a few years in hard-water areas.
How do you choose and specify the right kit?
Get the measurements wrong and you’ll either force a kit that leaks or find it simply won’t reach. Two figures matter more than any others: the vertical depth from the bath’s top edge down to the centre of the overflow hole, and the horizontal distance between the overflow hole and the drain outlet. Vatero’s measuring guide treats these as the two critical dimensions to check before ordering, since even a few millimetres out can leave a kit under tension and prone to weeping at the joints.
Work through this before you add anything to your basket:
- Measure depth to the overflow centre and the drain-to-overflow horizontal distance, and write both down.
- Confirm the outlet size, almost always 40mm (1½") on UK domestic baths, with a trap seal depth of 19mm for a standard fit or 50mm where building regulations demand a deeper seal.
- If you’re fitting a cable-operated pop-up, check the cable length. A standard 1020mm cable covers most baths, but deeper tubs may need 1050mm or longer, or the actuator will feel stiff and unreliable.
- Match the trim finish and mechanism to your existing rough plumbing if you’re only replacing the visible parts.
- Decide your quality tier: budget kits use thinner washers and more brittle plastic, while mid-range brands like McAlpine tend to hold a seal longer under daily use.
Pro Tip: Buy the kit only after you’ve measured the bath, not before. BookaBuilderUK’s fitting guide points to mismeasured drain-to-overflow distance as the single most common cause of leaks in DIY installations.
How do you fit or replace a bath waste and overflow?
Fitting a new bath waste and overflow is a manageable weekend job if you work through it in order and resist the urge to skip the test stage. Rushing the final tightening is where most leaks are born.
Before you start, clear access underneath the bath, remove the side panel if fitted, and lay out your tools: an adjustable spanner, a basin wrench for awkward angles, PTFE tape or silicone sealant, and a torch. If you’re mid-renovation, our bathroom renovation planning guide covers where waste fitting sits in the wider sequence of works.
- Remove the old waste and trap. Undo the trap connections first, then the overflow linkage, then the waste body itself. Inspect the rough plumbing for corrosion, and check whether the old mechanism was cable-operated or linkage-operated. Fitting new trim onto the wrong linkage type is a classic DIY error APM Plumbing & Electrical warns against.
- Dry-fit the new kit loosely before committing to any sealant. Offer up the waste body, overflow plate, and trap without forcing anything into alignment. If a fitting won’t sit square, something is measured wrong, not just stiff.
- Set the correct fall on the waste pipe. A fall of roughly 1:80, around 12mm per metre, keeps water moving without inducing self-siphonage, according to squote’s bath installation notes. Too flat and water sits in the pipe; too steep and you risk pulling the trap seal dry.
- Connect the trap and tighten by hand, then add a small final turn with a spanner. Plastic compression nuts crack easily if overtightened, so stop as soon as resistance firms up.
- Run a dry-run leak test. Fill the bath halfway, then check every joint from below with a torch and dry cloth before you seal anything or refit the panel, a step BookaBuilderUK treats as essential rather than optional.
- Drain the bath and retest under flow. A static fill test misses slow weeps that only show up once water is actually moving through the trap at volume.
- Seal and finish. Once you’re confident there are no leaks, apply a bead of sanitary silicone around the waste flange and refit the panel.
Many DIY plumbing callouts trace back to joints that were never leak-tested before the panel went back on, which is exactly why the dry-run stage in step 5 earns its place in every trade checklist rather than being treated as belt-and-braces.
Why is my bath waste leaking or draining slowly?
Most bath waste problems trace back to one of a handful of causes, and diagnosing the right one saves you buying parts you don’t need.
- Distorted or over-tightened washers cause slow weeps around the waste flange. Overtightening squeezes a rubber washer out of shape rather than sealing it better, so back off and refit with a fresh washer if you suspect this.
- Siphonage or a drying trap shows up as gurgling and bathroom odours. If it happens repeatedly, the trap seal may be too shallow for your pipe run; switching to a 50mm seal trap or adding an air admittance valve often resolves it.
- Corroded or seized cable-operated pop-ups tend to fail gradually, sticking half-open before jamming completely. If cleaning the cable run doesn’t help, the actuator itself has usually worn out.
- Poor access for servicing turns a five-minute fix into a full panel removal. Top-access trap designs, including McAlpine’s range, let you clear blockages and clean the trap from above the bath without touching the panel at all, which is worth planning for at installation.
If more than one of these symptoms shows up at once, or the waste body itself has visible corrosion, replace the whole kit rather than patching individual parts. A new trim rarely seals well against an old, pitted waste body.
Combined waste and overflow kits and when to use them
A combined kit bundles the waste, overflow, and trap into one matched assembly, and for most straightforward bath replacements it’s the sensible default. Buying components separately only makes sense when you’re reusing an unusually shaped bath, matching a specific finish that isn’t sold as part of a kit, or working with commercial-spec plumbing that needs a non-standard trap depth.
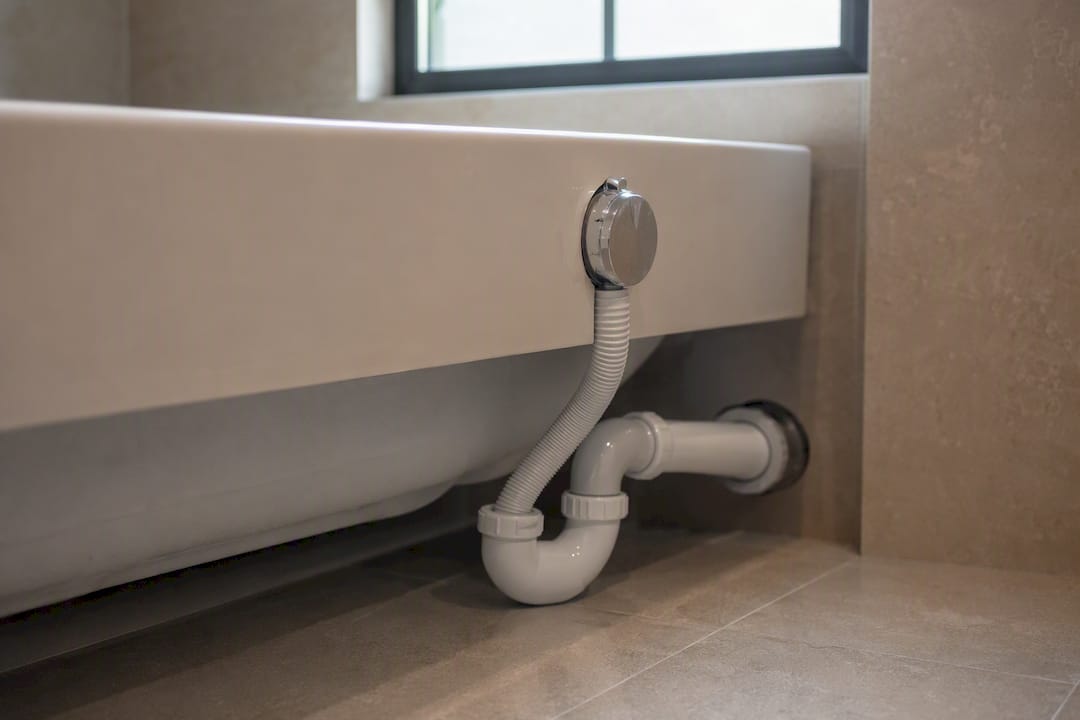
The main advantage of a combined kit is that every part is designed to work together: the overflow plate, the flexible or rigid pipe run, and the trap all share compatible fittings and seal profiles, so you’re not guessing whether a separately bought overflow will line up with a separately bought waste. This matters most with slotted systems, where the overflow water travels internally through the waste pipe rather than a dedicated external pipe, so any mismatch in bore size or slot alignment causes a genuine functional problem, not just a cosmetic one.
Combined kits also tend to be better value than buying parts individually, since manufacturers price the bundle below the sum of its components. They’re the right call for nearly all standard domestic bathroom renovations, new bathroom fit-outs, and straightforward like-for-like replacements. Where they’re less suitable is retrofits with unusual access constraints, where a flexible trim-only kit that reuses existing rough plumbing may be the more practical choice, as covered in the fitting section above.
What rules govern bath waste and overflow installation?
Bath waste and overflow installation in the UK falls under Building Regulations Approved Document H, which covers drainage and waste disposal for domestic properties. It sets requirements for pipe falls, trap seal depths, and the general principle that waste water must discharge without creating a health or damp risk to the building.
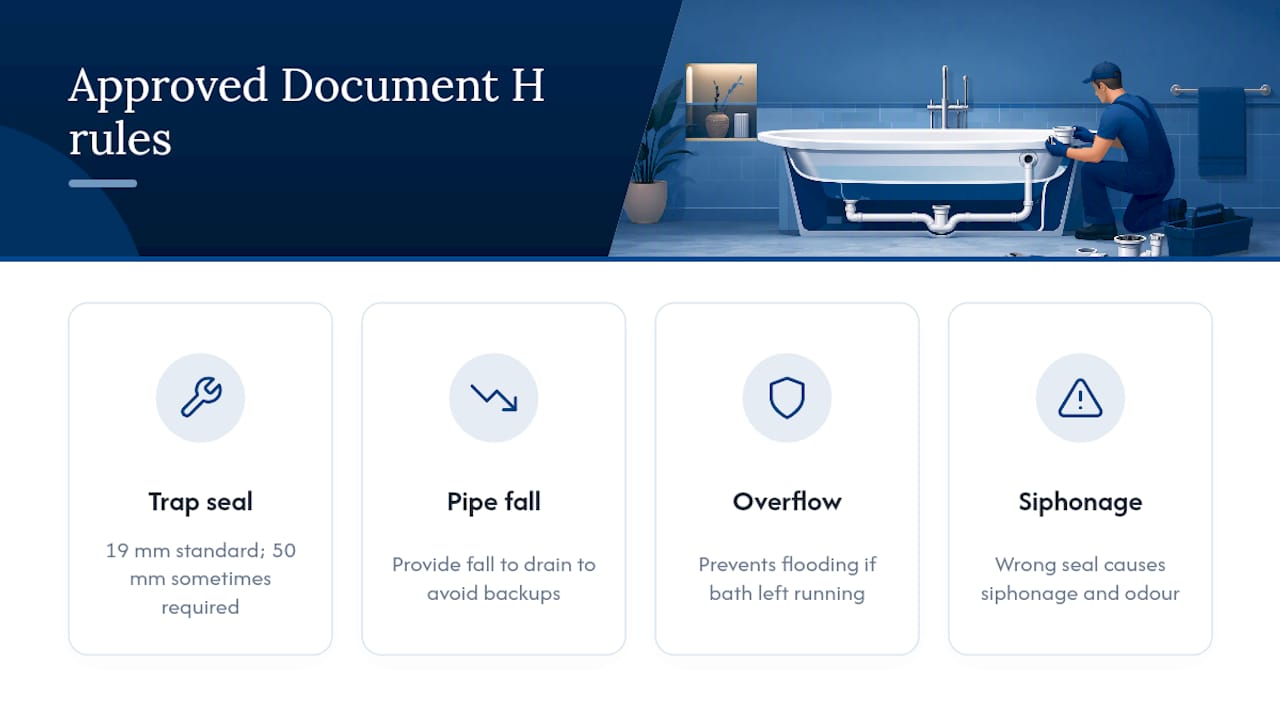
The overflow itself exists specifically to prevent water damage if a bath is left running unattended, and any installation that removes or bypasses it, for instance by fitting a waste with no overflow provision on a bath that was designed to have one, risks non-compliance as well as a genuine flood risk. If you’re doing structural work alongside a bathroom refit, it’s worth checking whether your local authority requires Building Control sign-off, since some renovation work triggers notification requirements even when the plumbing itself is straightforward.
Trap seal depth is one of the more commonly overlooked regulatory details. Standard domestic installations typically use a 19mm seal, but deeper seals of 50mm are sometimes required depending on the pipe run and how the property’s overall drainage system is configured. Getting this wrong doesn’t just risk a regulatory issue; it’s also one of the more common causes of siphonage and unpleasant odours discussed earlier. If you’re unsure which depth your property needs, a qualified plumber or your local Building Control office can confirm it before you buy.
How do you keep a bath waste and overflow working longer?
A bath waste and overflow system has no moving parts to speak of beyond the plug mechanism, so most of what shortens its life is preventable with a few minutes of attention every few months.
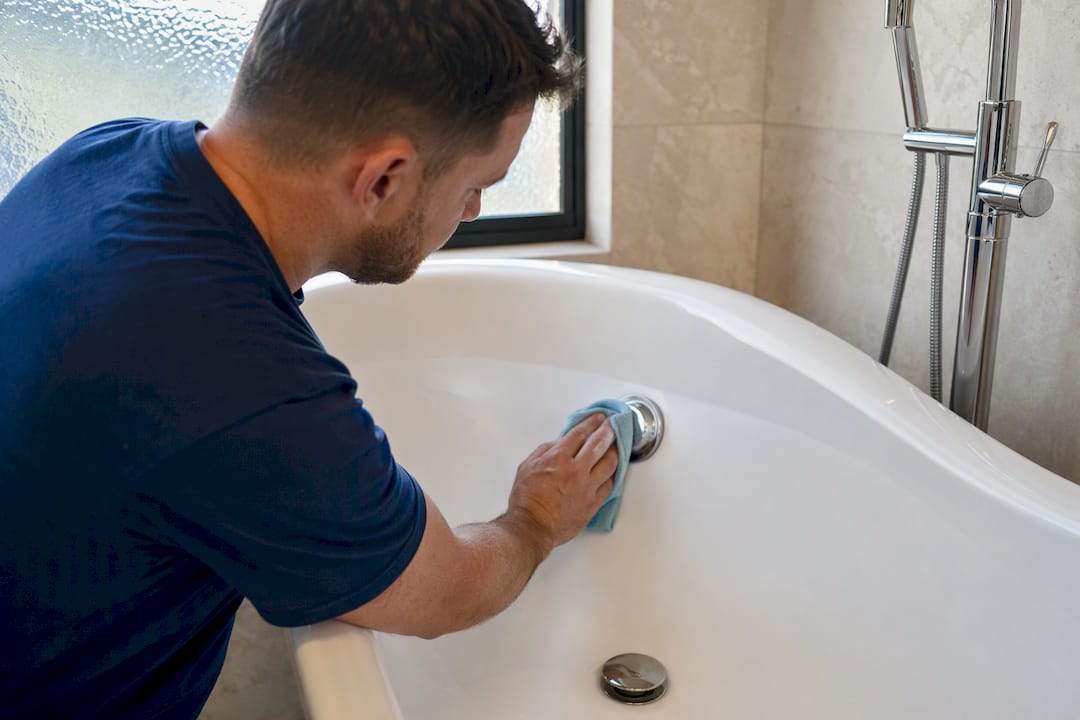
Clean the overflow slot or plate periodically. Hair and soap scum build up here just as readily as around the plughole, and a blocked overflow defeats the entire point of having one. Wipe down the visible waste flange and overflow trim with a non-abrasive cleaner rather than anything acidic, since limescale removers can degrade chrome plating and rubber seals over time.
Check the trap for slow drainage every few months, particularly in hard-water areas where scale builds up inside the pipe run faster than most people expect. If your bath sees light use, for instance in a guest bathroom, run water through it periodically so the trap seal doesn’t dry out and let odours back into the room.
For cable-operated pop-ups, an occasional drop of silicone-based lubricant on the cable mechanism keeps it operating smoothly and reduces the strain that eventually causes actuators to seize. And if you ever notice the plug mechanism feeling gritty or stiff rather than smooth, that’s usually the first sign a component needs attention before it fails outright, well before you’d need to consider a full kit replacement.
Why trust this guide to bath waste and overflow fitting?
This guide draws on trade fitting checklists, UK building standards, and measurement guidance from plumbing professionals, not guesswork. Simcodirect stocks a wide range of bathroom essentials alongside washroom and heating products, backed by fast delivery and a 30-day returns policy that gives you room to check parts fit before committing.
If you’re replacing a waste and want confidence the trap, overflow trim, and finish will match your existing rough plumbing, buying from a retailer with clear returns terms removes much of the risk from getting a measurement slightly wrong.
— Carl
Get your bathroom fittings sorted with Simcodirect
Once you know exactly what your bath needs, whether that’s a slotted combined kit, a deeper 50mm seal trap, or a McAlpine-style top-access fitting for easier servicing later, the next job is sourcing parts that actually match. Simcodirect stocks a broad range of bathroom essentials alongside heating and washroom products, all backed by fast UK delivery and a straightforward 30-day returns policy, so a measurement that’s a few millimetres out doesn’t turn into a wasted purchase.
If you’d rather hand the fitting work to a professional, Red Eagle’s bathroom fitting service covers installation and repairs at a fixed price. And if you’re planning a wider refit and want to get the fittings right from the start, our space-saving bathroom fittings guide is worth a read before you order. Browse Simcodirect’s heating and towel radiator range to finish the room once your plumbing work is done, or head to our full product catalogue to see everything currently in stock.
Sources
- How to replace a bath waste and trap: A plumber’s guide — APM Plumbing & Electrical
- How to fit a bath waste and overflow without leaks — BookaBuilderUK
- How to measure a bathtub drain & overflow before ordering — Vatero Bath + Kitchen
- Bath installation: cradle, legs & waste setup — squote